Introduction to Supermarket Checkout Counters
When it comes to running a successful supermarket, one of the most critical areas to focus on is the checkout counter. It’s not just about processing payments; it’s about creating a seamless and efficient shopping experience for customers. A well-designed cashier checkout counter can significantly improve customer satisfaction, reduce wait times, and even boost sales.
Why Is a Well-Designed Checkout Counter Important?
A checkout counter is often the last point of interaction between a customer and the store. A poorly designed counter can lead to frustration, long queues, and even lost sales. On the other hand, an efficient and well-organized checkout counter can streamline the payment process, enhance the overall shopping experience, and leave a positive impression on customers.
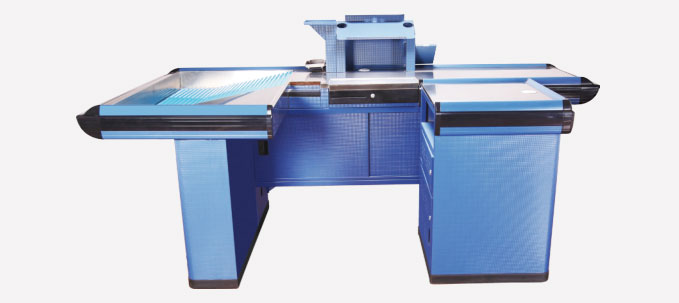
Materials Needed to Make a Supermarket Cashier Checkout Counter
Before diving into the design process, it’s essential to gather the right materials. Here’s a list of what you’ll need:
– Durable wood or metal for the counter structure
– A sturdy base to support the counter’s weight
– A smooth, easy-to-clean surface material (e.g., laminated wood or stainless steel)
– Cash register and card payment terminals
– Barcode scanner
– Receipt printer
– Bagging area with hooks or compartments for bags
– Security features (e.g., anti-theft mirrors or alarms)
Now that we’ve covered the essential materials, let’s move on to the design and structure of your checkout counter.
Designing the Structure of Your Checkout Counter
The design of your checkout counter should prioritize functionality and ergonomics. Here are some key considerations:
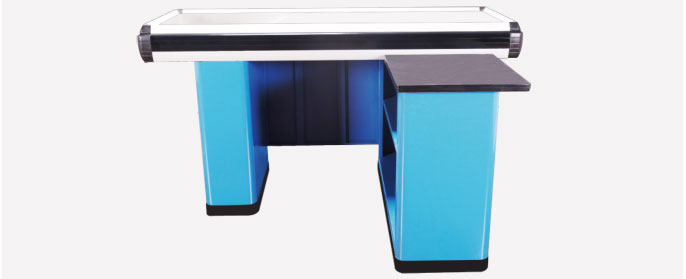
1. **Height and Depth**: The counter should be at a comfortable height for both the cashier and the customers. A standard height of about 36-40 inches (91-102 cm) is recommended. The depth should provide enough space for the cashier to work comfortably without feeling cramped.
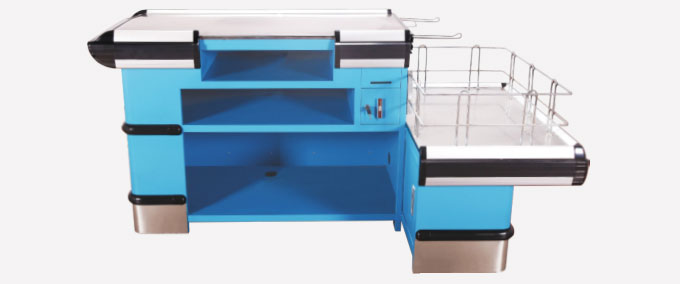
2. **Work Surface**: The work surface should be wide enough to accommodate the cash register, barcode scanner, and receipt printer. It should also have a slight incline to prevent items from sliding off.
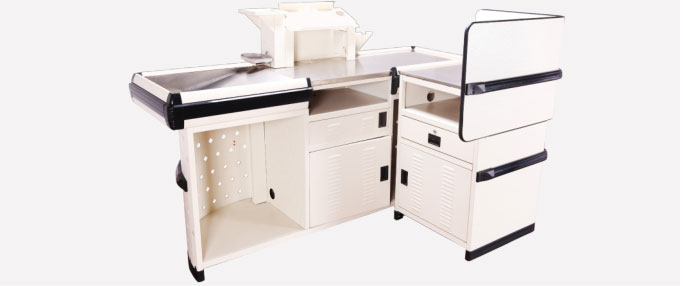
3. **Storage Compartments**: Include storage compartments for essential items like receipts, pens, and bags. This helps keep the workspace organized and clutter-free.
4. **Customer Side**: On the customer side, ensure there’s enough space for them to place their items and complete the payment process comfortably. A small ledge or tray for placing items can be helpful.
Step-by-Step Guide to Making a Supermarket Cashier Checkout Counter
Now that we’ve covered the design aspects, let’s break down the process of making a supermarket cashier checkout counter into simple steps.
1. **Plan the Layout**: Start by sketching a detailed layout of your checkout counter. Consider the space available, the number of cashiers, and the flow of customers.
2. **Cut and Assemble the Frame**: Use your chosen material (wood or metal) to cut and assemble the frame of the counter. Ensure it’s sturdy and can support the weight of the equipment and items.
3. **Install the Work Surface**: Attach the work surface to the frame. Make sure it’s smooth and even.
4. **Set Up the Equipment**: Install the cash register, barcode scanner, and receipt printer. Ensure all cables are neatly organized and secured.
5. **Add Storage Compartments**: Install shelves, drawers, or compartments for storing receipts, bags, and other essentials.
6. **Test the Setup**: Before putting the counter into use, test it thoroughly. Ensure all equipment is functioning properly and the design meets your expectations.
Optimizing the Checkout Counter for Better Efficiency
Once your checkout counter is set up, it’s important to optimize it for maximum efficiency. Here are a few tips:
– **Streamline the Payment Process**: Ensure the cash register and card payment terminals are easy to use and reduce the time spent on each transaction.
– **Use Signage**: Place clear signs indicating the different sections of the checkout process, such as “Pay Here” or “Bagging Area.”
– **Train Cashiers**: Proper training for cashiers can significantly improve the efficiency of the checkout process.
Maintenance and Upkeep of the Checkout Counter
Regular maintenance is crucial to ensure the checkout counter remains functional and appealing. Here are a few tips:
– **Clean the Surface Regularly**: The work surface should be cleaned daily to prevent dust and dirt from accumulating.
– **Check Equipment**: Regularly inspect the cash register, barcode scanner, and receipt printer to ensure they’re in good working condition.
– **Restock Supplies**: Keep a steady supply of receipts, bags, and other essentials.
Conclusion
Designing and making a supermarket cashier checkout counter is a task that requires careful planning and attention to detail. By following the steps outlined in this guide, you can create a checkout counter that is not only functional but also enhances the overall shopping experience for your customers. Remember, a well-designed checkout counter is an investment in your store’s success.