Introduction to DIY Retail Checkout Counters
In the fast-paced world of retail, businesses are constantly looking for ways to enhance customer experience while keeping costs under control. One innovative solution that has gained popularity in recent years is the DIY retail checkout counter. But what exactly makes these DIY checkout counters so appealing? Let’s dive into the world of DIY retail solutions and explore how they can transform your business.
What is a DIY Retail Checkout Counter?
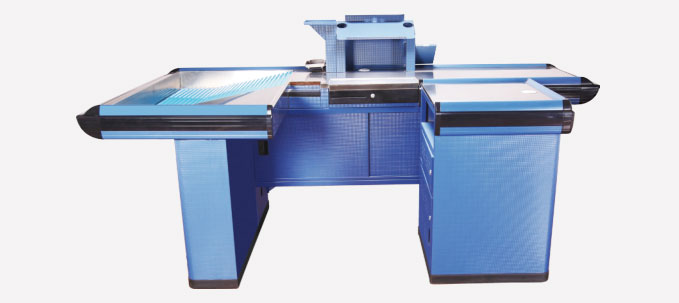
A DIY retail checkout counter is a self-serve kiosk or counter designed to allow customers to complete their purchases independently. These counters are typically equipped with barcode scanners, payment terminals, and sometimes even bagging stations. The idea behind DIY checkout is to streamline the shopping process, reduce wait times, and empower customers to take control of their purchasing experience.
Why Are Businesses Embracing DIY Checkout Counters?
The adoption of DIY retail checkout counters is on the rise, and for good reason. Let’s break it down:
1. **Improved Customer Experience**:
Let’s face it—waiting in long lines is one of the most frustrating aspects of shopping. DIY checkout counters minimize this frustration by allowing customers to check out quickly and efficiently. This leads to higher customer satisfaction and repeat business.
2. **Cost Efficiency**:
By automating the checkout process, businesses can reduce labor costs associated with staffing multiple cashiers. This doesn’t mean eliminating jobs, but rather reallocating employees to more critical areas of the store, such as customer service or inventory management.
3. **Space Optimization**:
Traditional checkout counters can take up valuable floor space, especially in smaller retail environments. DIY checkout counters are often compact and can be strategically placed to maximize space without compromising functionality.
How to Implement DIY Retail Checkout Counters in Your Store
Implementing a DIY checkout system may seem daunting, but with the right approach, it can be a seamless process. Here are some steps to consider:
1. **Assess Your Needs**:
Before jumping into DIY checkout, evaluate your store’s specific requirements. Consider the size of your store, the volume of customers, and the types of products you sell. This will help you determine the number of DIY counters needed and their ideal placement.
2. **Choose the Right Technology**:
The success of your DIY checkout system depends heavily on the technology you use. Look for systems that are user-friendly, reliable, and integrate seamlessly with your existing POS (Point of Sale) software.
3. **Train Your Staff**:
While DIY checkout reduces the need for traditional cashiers, it’s important to have staff on hand to assist customers with any issues that may arise. Train your team to be tech-savvy and customer-focused to ensure a smooth transition.
4. **Monitor and Adjust**:
Once your DIY checkout counters are up and running, keep a close eye on how they’re performing. Gather feedback from customers and make adjustments as needed to optimize the experience.
DIY Retail Checkout Counter Design: Tips and Tricks
Designing your DIY checkout counter is just as important as its functionality. Here are some design tips to keep in mind:
1. **Keep It Simple**:
A cluttered or overly complicated design can confuse customers and defeat the purpose of DIY checkout. Opt for a clean, intuitive design that guides customers through the checkout process with ease.
2. **Ergonomics Matter**:
Ensure that your DIY checkout counter is ergonomically friendly. The height, placement of scanners, and accessibility of payment terminals should be designed with the customer’s comfort in mind.
3.